PayloadCMS from Scratch #3 - Access Control and Users
Author
Adrian Maj
Date published

Having learned the basics of collections and global data, the next step is mastering access control. Thanks to this, we can effectively secure our collections against unauthorized access. In this post, I'll also cover the topic of users who - although they are a collection - have several unique characteristics, which makes them worth discussing separately. Understanding these concepts will allow you to create an application where each user will have access only to the resources they should - which is crucial in any professional project.
Creating access control
By default, each collection has automatically defined basic access control that checks whether there is a user in the submitted request. This ensures that only authorized users have access to the data. We can override each access control with our own functions that return true or false, preceded by any logic.
⚠️ Note: Local API does not respect access control and can retrieve all data! If we want to restrict access to this API as well, we need to add the overrideAccess: false option to the queries.
Let's move on to the example project from the previous part, you can also find the project repository here.
In the collections/Users.ts file, there is the basic user collection of our application. Currently, it doesn't have any fields or specified access rules and looks as follows:
1import type { CollectionConfig } from 'payload'23export const Users: CollectionConfig = {4 slug: 'users',5 admin: {6 useAsTitle: 'email',7 },8 auth: true,9 fields: [10 // Email added by default11 // Add more fields as needed12 ],13}
However, we would like to divide the users of our application into different roles that will have varying levels of access. For this purpose, we add a select type field named, for example, role, and define available user roles such as admin, editor, and user.
This field must be required because each user must have an assigned role. We can set the basic user as the default value so that newly created users have minimal access.
1import type { CollectionConfig } from 'payload'23export const Users: CollectionConfig = {4 slug: 'users',5 admin: {6 useAsTitle: 'email',7 },8 auth: true,9 fields: [10 {11 name: 'role',12 type: 'select',13 options: [14 { label: 'Admin', value: 'admin' },15 { label: 'Editor', value: 'editor' },16 { label: 'User', value: 'user' },17 ],18 required: true,19 defaultValue: 'user',20 },21 ],22}
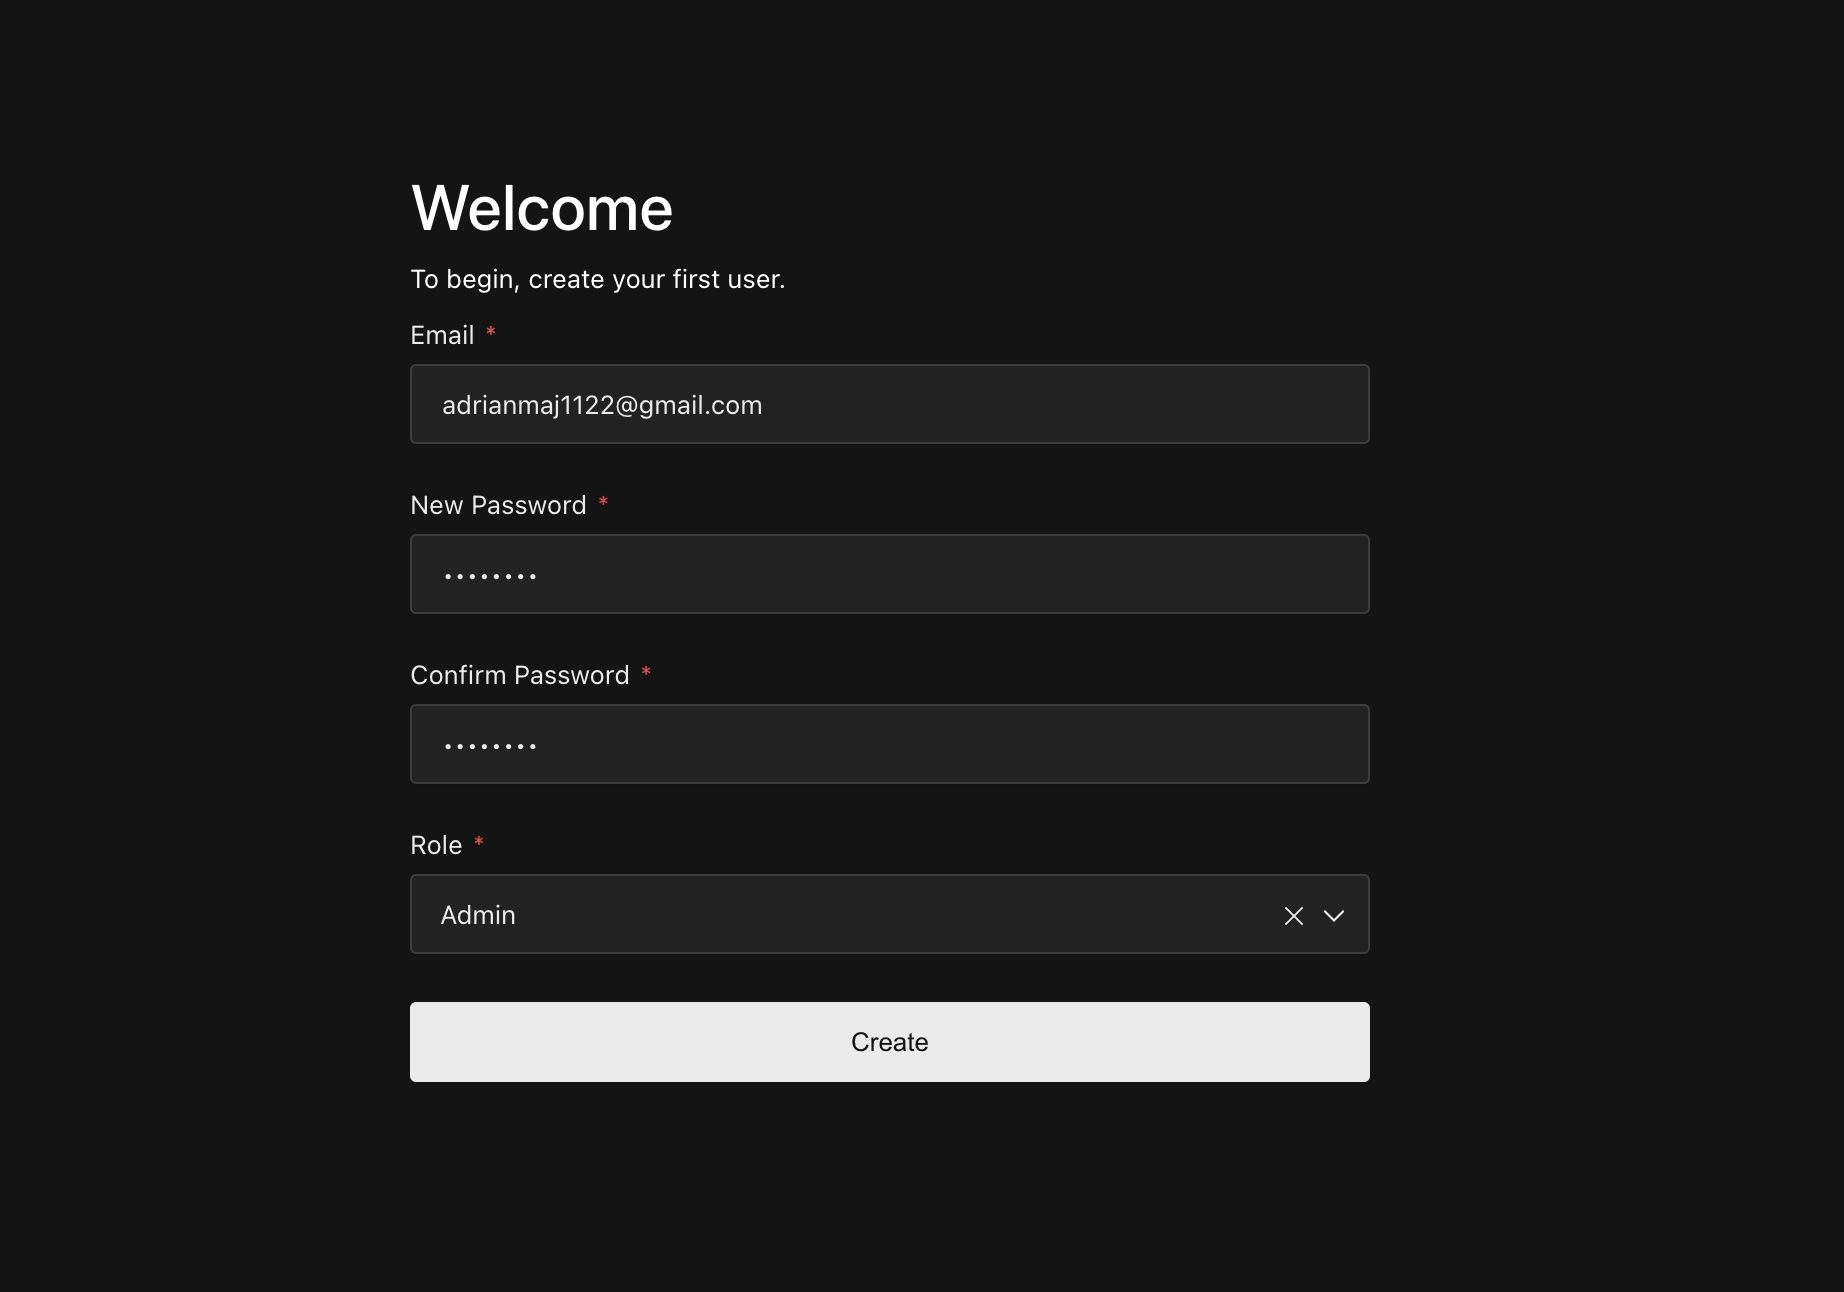
Now when creating a new user, both during the first project launch and when adding another one, we will be asked to select the appropriate role:

Currently, the created roles have no impact on access to documents - each of them works identically. We must therefore create appropriate access control functions that take into account not only the user themselves, but also their assigned role.
💡 Tip: Functions defining access control can be defined directly in the collection, in the access options. However, this is not a good practice if we want them to be reusable in other collections - as in this case.
In the src folder, we create an access folder, and in it three files corresponding to individual roles: admin.ts, editor.ts, and user.ts. The project structure should look as follows:
1📁 src2├─ 📁 access3│ ├─ 📄 admin.ts4│ ├─ 📄 editor.ts5│ └─ 📄 user.ts6├─ 📁 app7├─ 📁 collections8│ ├─ 📄 Media.ts9│ ├─ 📄 Users.ts10│ └─ 📄 payload-types.ts11└─ 📄 payload.config.ts
Let's move on to the admin.ts file, where we create the simplest function to check if the user's role is "admin". This function checks:
- Whether the user exists (optional chaining)
- Whether the user has the
adminrole
If these conditions are not met, the function will return false, and access to the document will not be granted.
1import { type Access } from 'payload'23export const admin: Access = ({ req: { user } }) => {4 return user?.role === 'admin'5}
We give access functions the Access type, which we can import from the main Payload library. This gives us full TypeScript support and better control over types.
Similarly, we declare a function for the editor role, with the difference that both editor and admin should have access. Here I used a slightly different approach - instead of several conditions, I used an array of roles. This way we can easily extend the function with additional roles in the future:
1import { type Access } from 'payload'23export const editor: Access = ({ req: { user } }) => {4 return Boolean(user && ['admin', 'editor'].includes(user.role))5}
This solution means that adding another role only requires adding it to the array, which makes the code more flexible and readable.
Based on this function, we also create a function for the standard user. Thanks to the approach used, we only need to add their role to the array:
1import { type Access } from 'payload'23export const user: Access = ({ req: { user } }) => {4 return Boolean(user && ['admin', 'editor', 'user'].includes(user.role))5}
💡 Tip: In this case, we're granting access to all roles, so checking them might seem unnecessary. However, it's worth doing as a safeguard for the future - if we add a new role in the future, e.g., with a lower access level than user, we can easily control it without changing the entire logic.
Implementing access control
Having already prepared roles and functions defining their access, we can use them in any collection to which we want to restrict access. We can also assign access at the level of specific fields or global settings. You can find more about different types of operations for which we can set access in the Payload documentation. Now we'll focus on the Posts collection, which we already have available in the project. Its configuration is in src/collections/Posts.ts and looks as follows:
1import type { CollectionConfig } from 'payload'23export const Posts: CollectionConfig = {4 slug: 'posts',5 access: {6 read: () => true,7 },8 fields: [9 {10 name: 'title',11 type: 'text',12 required: true,13 },14 {15 name: 'content',16 type: 'richText',17 required: true,18 },19 ],20}21
As you can see, we currently have defined access for reading - read: () => true. A function that always returns true means that everyone has access to read posts. This is consistent with the general assumption that posts should be publicly available. However, we would like to restrict the remaining access based on roles (not just the existence of a user), using our previously prepared access control functions.
1import { admin } from '@/access/admin'2import { editor } from '@/access/editor'3import type { CollectionConfig } from 'payload'45export const Posts: CollectionConfig = {6 slug: 'posts',7 access: {8 read: () => true,9 update: editor,10 create: admin,11 delete: admin,12 },13 fields: [14 {15 name: 'title',16 type: 'text',17 required: true,18 },19 {20 name: 'content',21 type: 'richText',22 required: true,23 },24 ],25}
From now on, creating and deleting posts will only be possible for users with the admin role. Both admins and editors will be able to edit and update posts, while regular users and non-logged-in individuals will only have read access.
To test this, simply create a user with the appropriate role and log in to their account. 🚀
How do users work?
Having a solid foundation of access control, we can now delve into the topic of users. In Payload, users are a special type of collection that we define by adding the auth option to a standard collection.
The auth parameter can take the value true if we want to use the default settings, or a configuration object in which we can customize, among other things, the maximum number of login attempts or the requirement for email verification.
We can use users for logging in both in the front-end part of the application and in the admin panel. Thanks to this, we don't have to implement our own authorization system on the frontend side, which significantly simplifies and speeds up work.
⚠️ Note: Only one user collection can have access to the admin panel. By default, this is the users collection, but we can change it in the payload-config.ts file by replacing the value in admin.user with the slug of our collection.
So let's go back to our Users collection, and look at the most interesting configuration options available in auth.
1auth: {2 tokenExpiration: 7200,3 verify: {4 generateEmailSubject: ({ req, user }) => `${user.email} Verify Your Email`,5 generateEmailHTML: (token) => {6 return `<a href="http://localhost:3000/verify-email/${token}">Verify Email</a>`7 },8 },9 maxLoginAttempts: 15,10 lockTime: 7200,11 loginWithUsername: false,12 useAPIKey: true,13 forgotPassword: {14 generateEmailHTML: (token) => {15 return `<a href="http://localhost:3000/reset-password/${token}">Reset Password</a>`16 },17 },18},
- tokenExpiration - specifies the time (in seconds) after which the token will expire, and the user will be automatically logged out.
- verify - enables email address verification before account creation. It can take the value true (for default configuration) or a configuration object. There is also the possibility to attach your own verification endpoint and perform additional operations before approving the account.
💡 Tip: You can use React Email to create attractive message templates tailored to your project, I use it myself in my projects and can recommend it. - maxLoginAttempts - specifies the maximum number of failed login attempts before the account is blocked for the time specified in
lockTime(also in seconds). - loginWithUsername - accepts
trueor a configuration object, allows the user to log in using a username instead of an email address. - useAPIKey - enables generating an API key for each user, which allows authorization using it. Useful when integrating Payload with external services - you can create a user with specific permissions and use it as a bridge between systems. The option accepts a
boolean (true/false)value. - forgotPassword - allows overriding the default email message with a password reset link, similar to the
verifyoption.
⚠️ Note: For email-related functions to work correctly, you must configure an appropriate mail provider, e.g., using nodemailerAdapter.
Summary
Well-configured access control is the foundation of security for any web application. Thanks to this article, you've learned how to precisely define access to documents for different user groups and how to create custom user collections with appropriate authorization and personalized emails.
In the next article, we'll explore the topic of hooks, which make it easy to add your own side-effects to standard operations in Payload, without the need to modify existing endpoints.
If you want to continue learning and explore the topic of PayloadCMS, I encourage you to follow my blog. Additionally, on my social media profiles, I will inform about new posts and updates related to Payload. You can find the source code from each post on my GitHub.

Learn how to create a new project in Payload and discover best practices for configuration that will help you take full advantage of its capabilities.

Learn how to create and manage collections and global data in PayloadCMS. Understand their differences, and structure your content efficiently.